 Special thanks to Sara for the lovely photos!
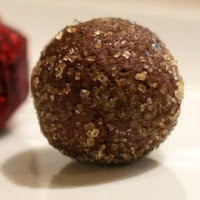
Well, I have finally made some truffles. Quite a while ago, actually, but I haven't found time to post anything about them yet.
This was quite an ordeal. I worked from a trio of recipes off of the
Sunset Magazine website, although I can no longer locate the recipes. The basic recipes I followed can be found below.
The most important thing to remember when making truffles is
proportions! If you use too much cream or other liquids (such as liquor for flavor), the truffles will turn into runny fudge or frosting, at best. Fantastic, tasty frosting, but that's probably not what you want. More about that in the "trouble-shooting" section.
Basic Recipe for Truffles, adapted from Sunset Magazine:Makes about 2 dozen 1-inch truffles of each variety Ingredients for espresso truffles:
* 3/4 cup whipping cream
* 1 tablespoon instant espresso powder
* 12 ounces bittersweet or semisweet chocolate, finely chopped
* 1 tablespoon Kahlua
* About 1/4 cup unsweetened cocoa
 Ingredients for raspberry truffles
* 1/2 cup whipping cream
* 12 ounces bittersweet or semisweet chocolate, finely chopped
* 1 tablespoon framboise or other raspberry liqueur
* 1/4 cup raspberry jam, melted and strained
* About 1/4 cup unsweetened cocoa
 Ingredients for ginger truffles
* 3/4 cup whipping cream
* 12 ounces bittersweet or semisweet chocolate, finely chopped
* 1 tablespoon rum
* 1/4 cup minced candied ginger
* About 1/4 cup unsweetened cocoa
Preparation1. In a 1- to 2-quart pan over high heat (for espresso truffles, add espresso powder and stir until dissolved in cream), bring cream to a boil. Meanwhile, place chopped chocolate in a bowl. Pour cream over chocolate and stir gently with a flexible spatula until chocolate is melted and mixture is smooth. (If chocolate does not melt completely, place bowl over a pan of barely simmering water and stir until melted and smooth.) Stir in other ingredients. Chill mixture until firm, at least 3 hours; if desired, cover and chill up to 1 week.
2. Line a 12- by 15-inch baking sheet with a piece of waxed paper. With a spoon, scoop out 1-tablespoon portions of chocolate mixture; place on waxed paper. If mixture is too firm to scoop, let stand at room temperature about 10 minutes.
3. Place 1/4 cup cocoa on a rimmed plate. Dust hands lightly with cocoa. With your hands, roll each scoop of chocolate mixture into a ball, then roll in cocoa to coat. Place each truffle in a small paper candy cup (see notes). To store, place truffles between layers of waxed paper in an airtight container and chill.
These truffles will last quite a while, but they are best when you eat them within a week or so.
Trouble-shooting:Need more flavor?I found that these recipes weren't nearly as flavorful as I was hoping for. If you find this to be true of your truffles, you can always add more flavoring. However, unless your flavoring is super-concentrated, more of or additional ingredients other than that mentioned in the recipe will really mess with your truffles. Too much liquid will make them like fudge, and not enough will make them too hard.
What if my truffles are too soft or too hard?Truffles are more or less solid because of the liquid (cream, flavoring) to solid (melted and then resolidified cocoa). If you want to augment a truffle recipe - add more flavoring, for example - it helps to have a little extra chocolate on hand. When the chocolate is still hot (not too hot to the touch, but warmer than room temperature), it should have the consistency of thick frosting.
Remelt the mixture
ALWAYS USE A DOUBLE BOILER WHEN MELTING CHOCOLATE!!! You can make a simple double-boiler by placing your mixture (still in its bowl - glass or ceramic are best)
If your truffle mixture is too hard, let it sit out for a little while before rolling it into balls. If that doesn't work, you can always remelt your mixture just enough to add a small amount of cream or other liquid. Quickly stir it in, and you'll probably be able to tell if you need to add more or not.
If your truffle mixture turns out too soft, you can remelt it and add a little more melted chocolate.

 After a ton of sewing and much rehearsal, our lion dancing troupe performed for the Lunar New Year at a local elementary school. Here's a clip from the dance below (I'm the head!)


